
Building a Local Weather Dashboard with ESP32 and DHT11
June 13, 2026
Some projects are useful because they are big.
This one is useful because it is small.
I wanted to build a simple weather dashboard that does not need a cloud platform, a database, a hosted frontend, or a third-party IoT dashboard. Just an ESP32, a DHT11 temperature and humidity sensor, a few jumper wires, and a browser connected to the same Wi-Fi network.
That became ESP32 Weather Report: a lightweight local dashboard served directly from the ESP32.
The full project is on GitHub: geek-commits/ESP32-Weather-Report
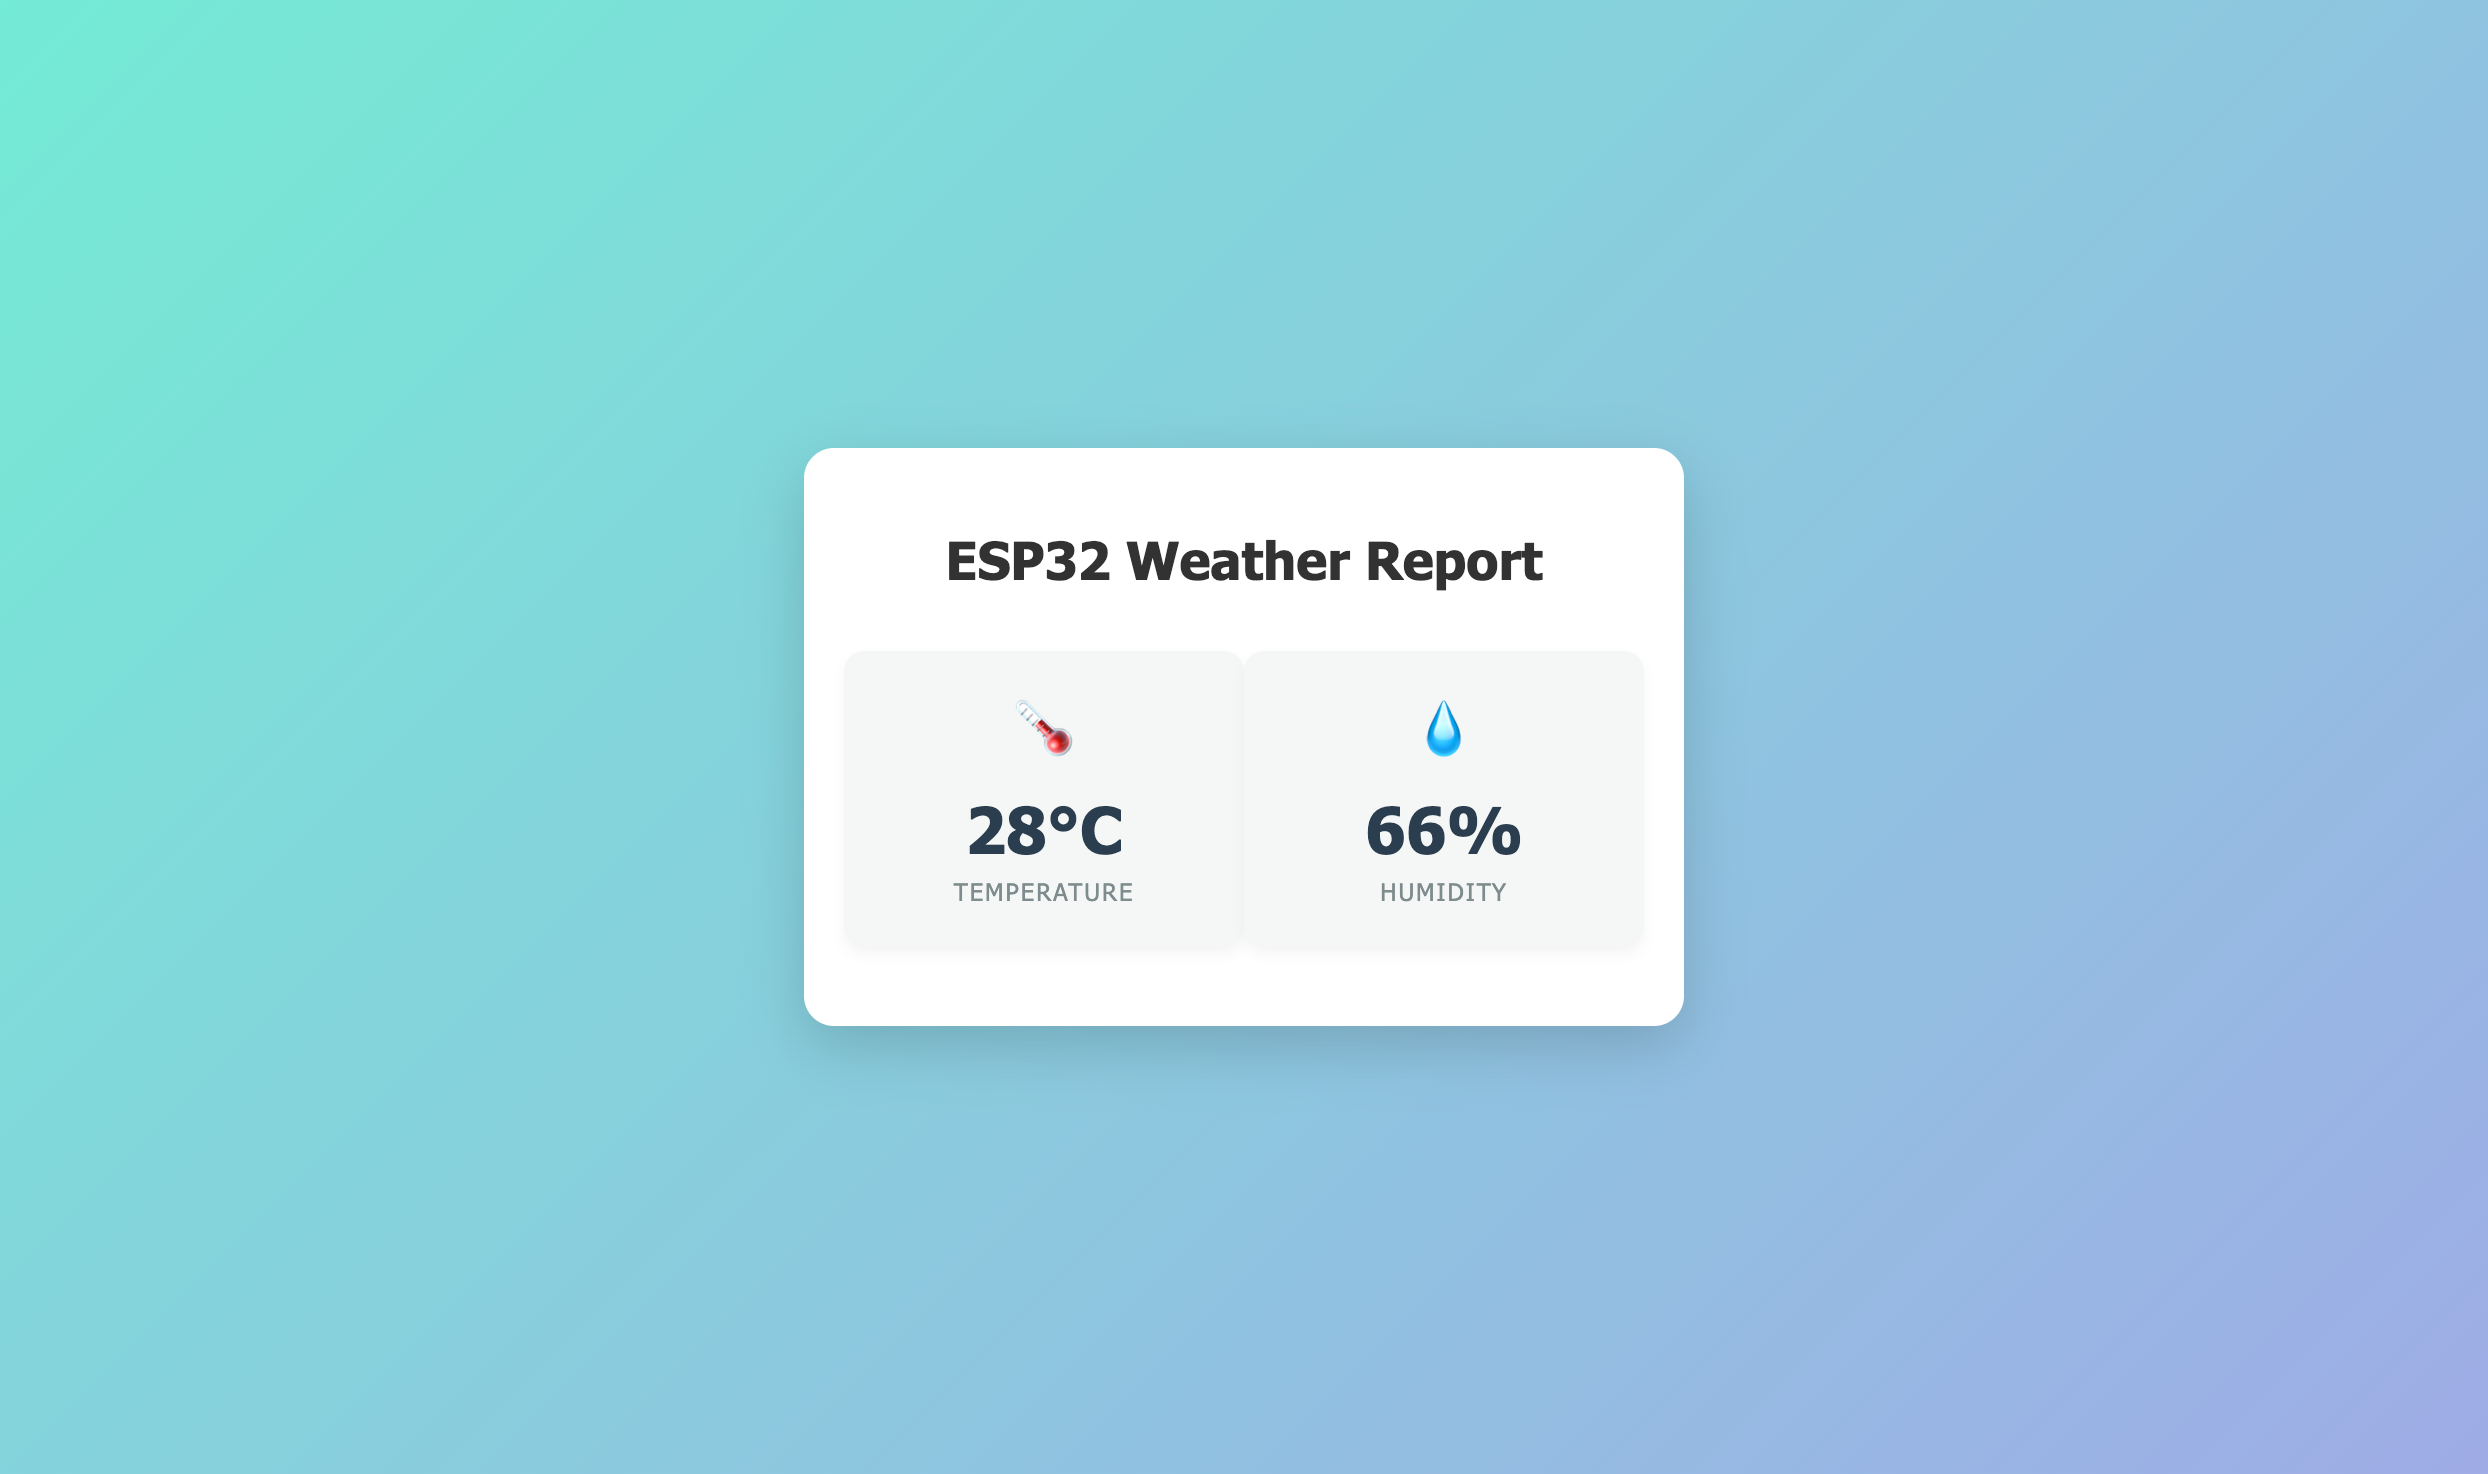
ESP32 Weather Report dashboard
The Idea
The project started from a basic question:
Can a microcontroller read the room temperature and serve that data as a clean web page by itself?
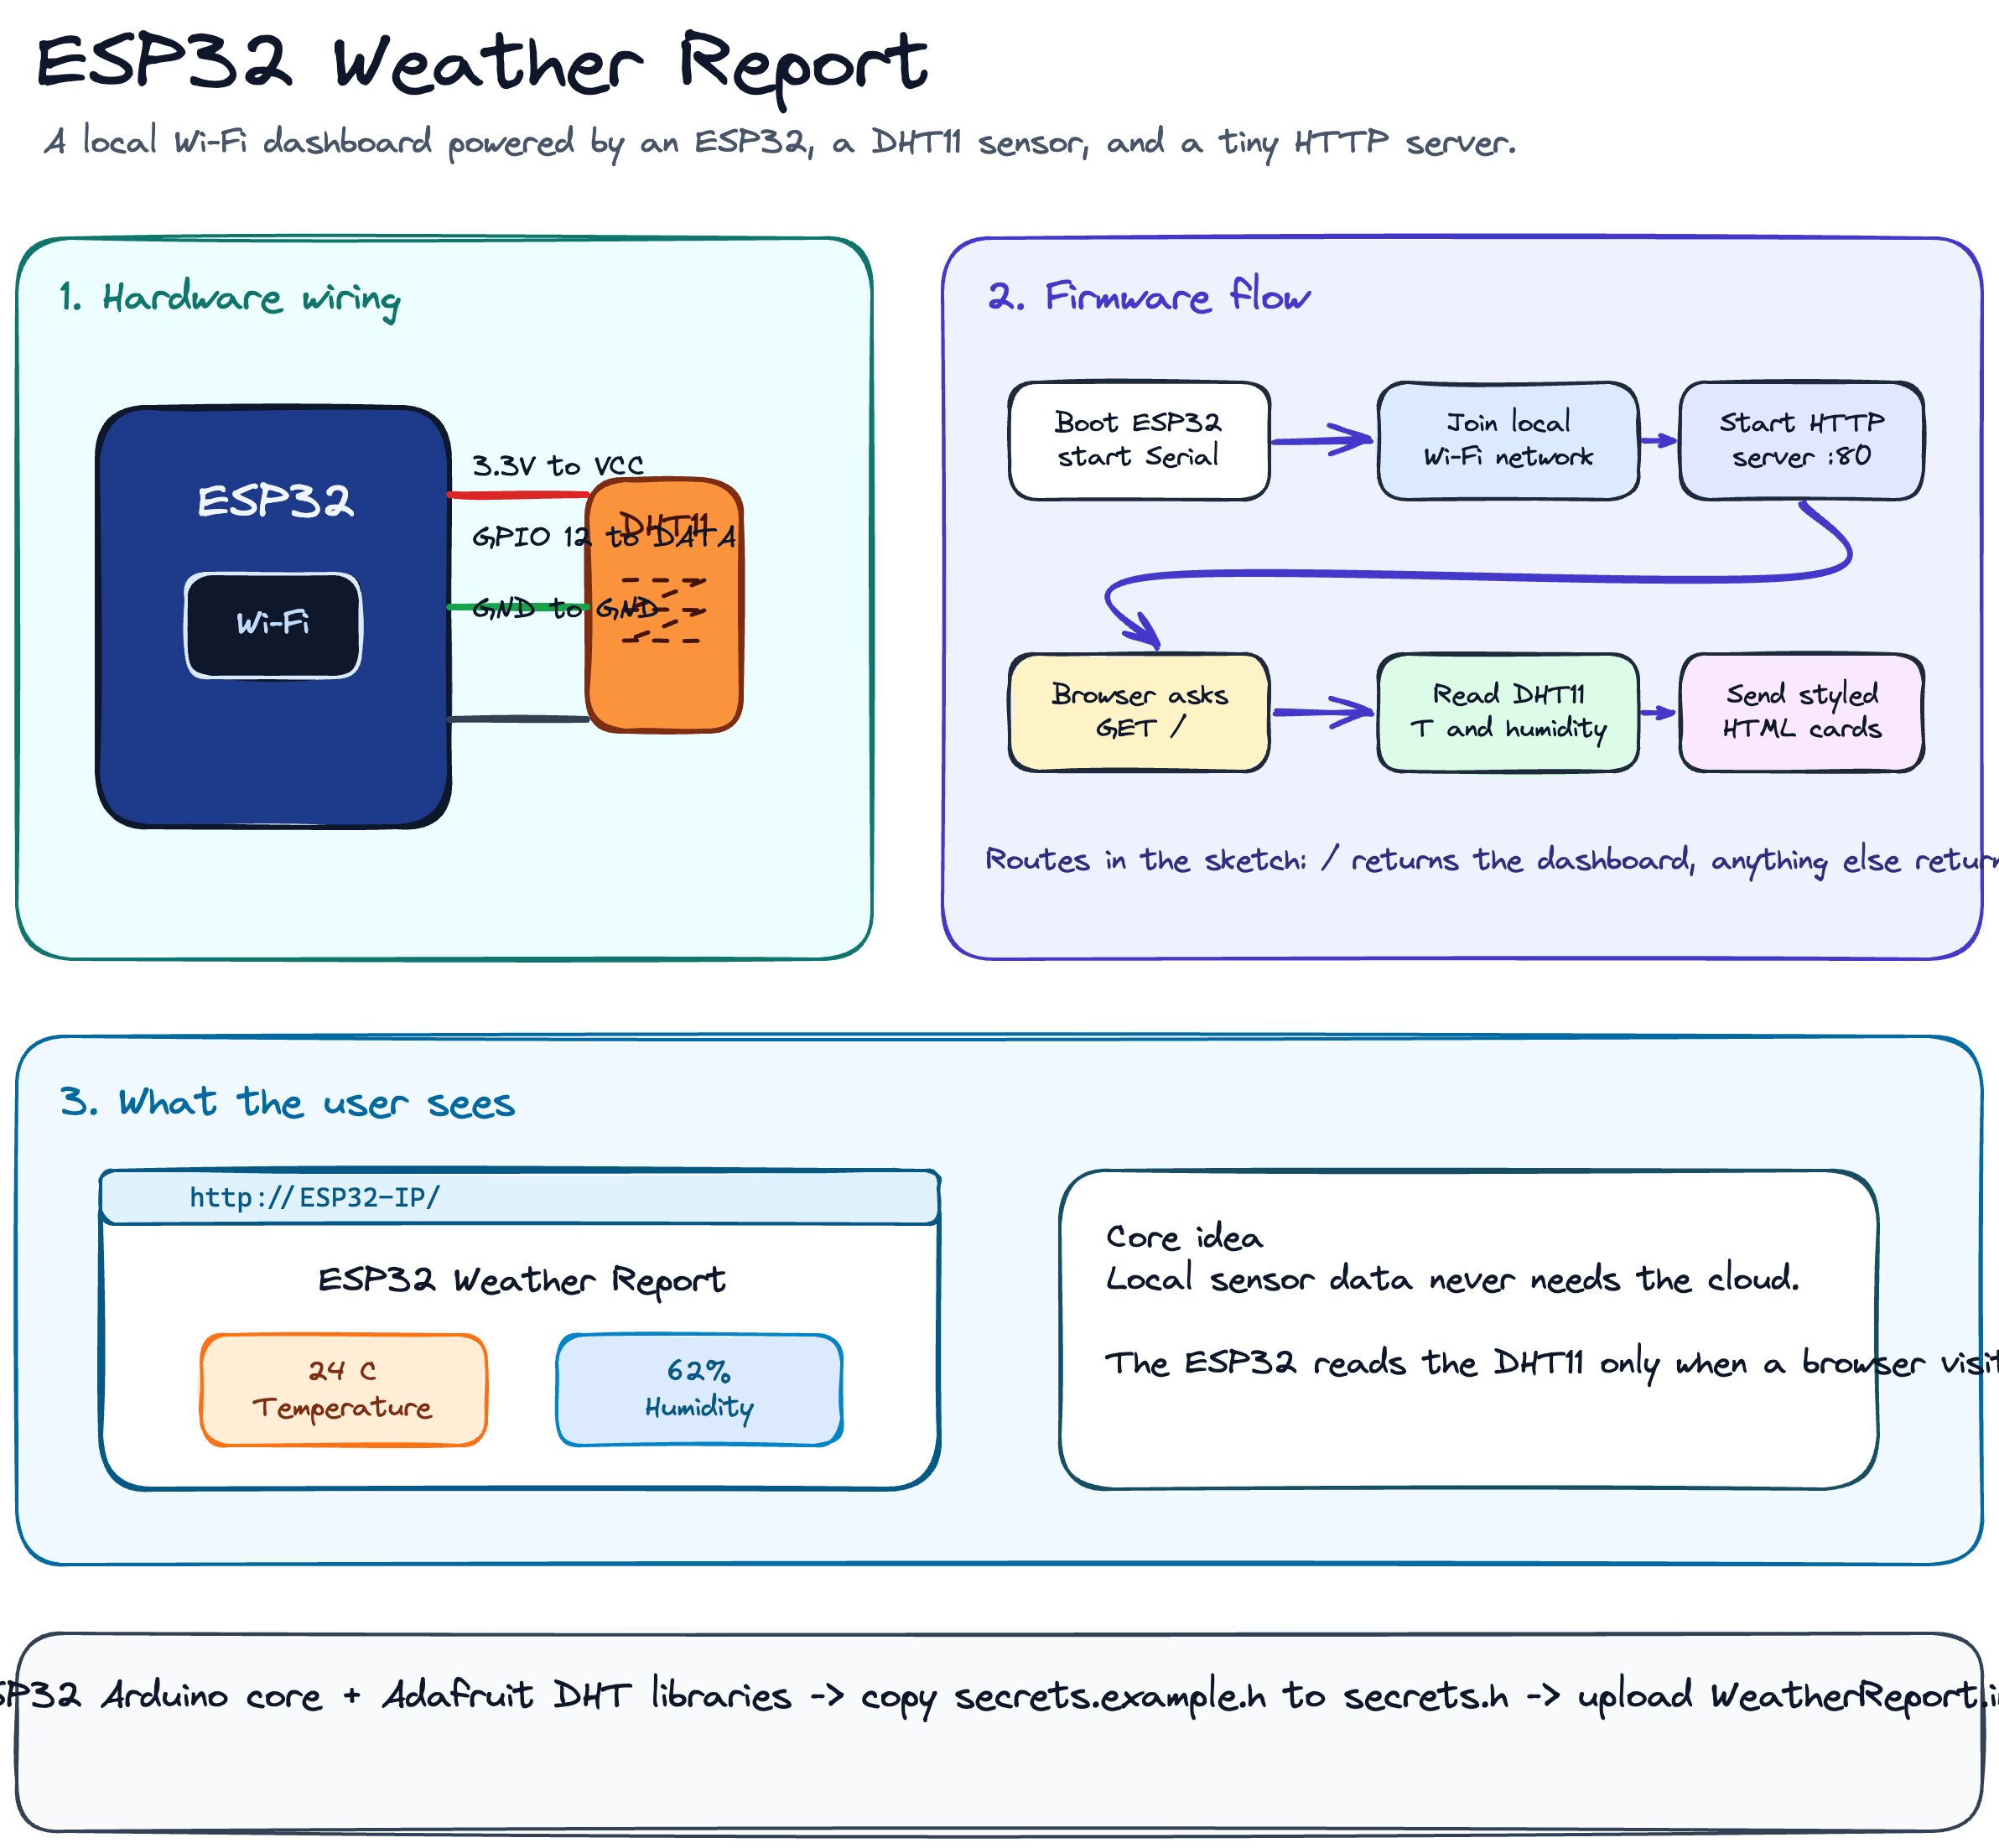
The answer is yes, and the architecture is simple enough to explain in one diagram:
DHT11 Sensor
     |
     | temperature + humidity
     v
ESP32
     |
     | local Wi-Fi / HTTP
     v
Browser Dashboard
The DHT11 handles the physical-world reading. The ESP32 connects to Wi-Fi, starts a small HTTP server on port 80, reads the sensor when someone opens the page, then returns an HTML dashboard.
No cloud. No MQTT broker. No external server. No dashboard subscription.
Just local hardware doing local work.
That constraint shaped the whole build.
What I Used
The hardware list is short:
Component ->Purpose ESP32 development board ->Main microcontroller and Wi-Fi device DHT11 sensor -> Temperature and humidity readings Breadboard ->Quick prototyping Jumper wires ->Connections between ESP32 and sensor 4.7 kOhm to 10 kOhm resistor Pull-up resistor if using a bare DHT11 Many DHT11 breakout modules already include the pull-up resistor. If you are using the bare four-pin sensor, you usually need the resistor between VCC and DATA.
For software, I used:
Arduino IDE
ESP32 board support package
DHT sensor libraryby AdafruitAdafruit Unified SensorBuilt-in ESP32
WiFiandWebServerlibraries
The ESP32 is doing two jobs here:
Reading data from the sensor.
Serving a small web page over the local network.
That combination is what makes the project feel more interesting than a normal serial monitor demo.
Wiring the Sensor
The DHT11 data pin is connected to GPIO 12 on the ESP32.
ESP32 3.3V   -> DHT11 VCC
ESP32 GPIO12 -> DHT11 DATA / OUT
ESP32 GND    -> DHT11 GND
This is the kind of wiring that looks too simple until the sensor returns nan and you start doubting every jumper wire on the table.
The practical checks are:
Confirm the sensor pin order before powering it.
Use
3.3V, not5V, unless your module clearly supports both.Check whether your module already has a pull-up resistor.
Make sure the code uses the same GPIO pin as your physical wiring.
In this project, the pin is defined in the sketch like this:
uint8_t DHTPin = 12;
And the sensor type is set as:
#define DHTTYPEDHT11
If you later move to a DHT22, BME280, or SHT31, this is one of the first places you will touch.
The ESP32 as a Web Server
The most important part of the build is not the sensor reading. That part is common in many beginner IoT projects.
The interesting part is that the ESP32 becomes the server.
The sketch includes:
#include<WiFi.h>
#include<WebServer.h>
#include"DHT.h"
#include"secrets.h"
Then it creates a web server on port 80:
WebServer server(80);
Inside setup(), the ESP32 connects to Wi-Fi:
WiFi.begin(ssid, password);

while (WiFi.status() != WL_CONNECTED) {
  delay(1000);
  Serial.print(".");
}
Once connected, it prints its local IP address:
Serial.print("Got IP: ");
Serial.println(WiFi.localIP());
That IP address is the dashboard URL. If the serial monitor prints something like:
Got IP: 192.168.1.197
Then the dashboard is available at:
<http://192.168.1.197>
As long as your phone or laptop is on the same Wi-Fi network, the browser can talk directly to the ESP32.
That is the part I like about this project. The microcontroller is not just collecting data. It is also presenting it.
Request Comes In, Reading Goes Out
The route handling is small:
server.on("/", handle_OnConnect);
server.onNotFound(handle_NotFound);
When the browser opens /, the ESP32 runs:
void handle_OnConnect() {
  Temperature = dht.readTemperature();
  Humidity = dht.readHumidity();
  server.send(200, "text/html", SendHTML(Temperature, Humidity));
}
That function does three things:
Reads temperature from the DHT11.
Reads humidity from the DHT11.
Sends back a generated HTML page.
The page itself is built as a string inside SendHTML():
String SendHTML(float Temperaturestat, float Humiditystat) {
  String ptr = "<!DOCTYPE html><html>\\n";
  ptr += "<head><meta charset=\\"UTF-8\\">";
  ptr += "<title>ESP32 Weather Report</title>\\n";
  // CSS and body markup continue here
  return ptr;
}
This is not how I would build a production web app, but for an ESP32 dashboard it makes sense. The HTML is tiny. The CSS is inline. The browser gets one complete page. The ESP32 does not need to manage static files, templates, bundlers, or any frontend build step.
That is the right kind of boring for a project like this.
The Dashboard
The dashboard has two cards:
Temperature in degrees Celsius
Humidity as a percentage
The design is intentionally simple: a centered white container, a soft gradient background, and two large values that can be read quickly.
ptr += "<div class=\\"value\\">" + String((int)Temperaturestat) + "°C</div>\\n";
ptr += "<div class=\\"label\\">Temperature</div>\\n";
The humidity card follows the same structure:
ptr += "<div class=\\"value\\">" + String((int)Humiditystat) + "%</div>\\n";
ptr += "<div class=\\"label\\">Humidity</div>\\n";
I cast the sensor values to integers because this dashboard is meant for quick room-level readings, not laboratory measurement. Showing 28.43 C would look more precise, but not more honest. The DHT11 itself is a basic sensor, so whole-number display matches the quality of the data.
This matters in small dashboards. Precision should match reality.
Keeping Wi-Fi Secrets Out of the Sketch
The sketch imports credentials from secrets.h.
That is the right move. Wi-Fi names and passwords should not live inside the main sketch, especially if the project is going to GitHub.
In the current sketch, the credential variables are expected as:
const char* ssid = SECRET_SSID;
const char* password = SECRET_PASS;
So the local secrets.h should look like this:
#pragma once

#define SECRET_SSID"YourNetworkName"
#define SECRET_PASS"YourPassword"
The important part is that the names must match what the sketch expects.
This is one small place where IoT projects can fail quietly. The wiring can be correct. The board can be fine. The libraries can be installed. But if the template uses ssid and password while the sketch expects SECRET_SSID and SECRET_PASS, the code will not compile.
That kind of mismatch is not dramatic, but it is exactly the type of detail that burns time
What Happens When Things Break
Small hardware projects are rarely broken in one big obvious way. They usually fail through a chain of small assumptions.
Here are the failure points I would check first.
The ESP32 does not connect to Wi-Fi
The ESP32 usually needs a 2.4 GHz Wi-Fi network. If your router is only exposing 5 GHz, the board may never connect.
Also check:
SSID spelling
Password spelling
Signal strength
Serial monitor baud rate set to
115200
The serial monitor is the first debugging surface. Without it, you are guessing.
The dashboard does not open
The browser device and the ESP32 must be on the same network.
If your router has client isolation enabled, your laptop may not be allowed to reach the ESP32 even though both are connected to Wi-Fi.
Also remember that the IP address can change after a restart. For a more stable setup, configure a DHCP reservation on your router or add mDNS later so the dashboard can be opened with a name like:
<http://esp32-weather.local>
The readings look wrong
The DHT11 is not a high-accuracy sensor. It is good for learning and rough indoor readings, but it is not the sensor I would use for serious monitoring.
If the dashboard shows invalid values, check:
GPIO pin
Sensor power
Ground connection
Pull-up resistor
Sensor type in code
In a future version, I would probably swap the DHT11 for a BME280 or SHT31.
What I Would Improve Next
The project works as a simple local dashboard, but there are clear upgrades that would make it better.
1. Add a JSON Endpoint
Right now the ESP32 returns a full HTML page.
I would add:
GET /api/weather
Returning:
{
  "temperature": 28,
  "humidity": 66
}
That would make the sensor data easier to reuse in another frontend, mobile app, or home automation setup.
2. Refresh Without Reloading the Page
The current version serves a static page from each request.
A better version could use JavaScript polling:
setInterval(fetchWeather, 5000);
Or Server-Sent Events if I want the ESP32 to push updates while the page stays open.
For this project, polling every few seconds is enough.
3. Store Historical Readings
The dashboard only shows the current reading.
Historical data would unlock more useful questions:
When is the room hottest?
How fast does humidity change?
Does the sensor behave differently at night?
For storage, I could start small with flash memory, then move to an external database if the project grows.
4. Add Basic Dashboard Protection
This is designed for a trusted local network, not the public internet.
Still, if the dashboard ends up on a shared network, I would add some basic access control. Not because the data is highly sensitive, but because exposing microcontroller web servers casually is a bad habit.
5. Clean Up the Project Structure
The README currently describes a folder named ESP32_Weather_Report, while the local sketch lives in WeatherReport.
That is easy to fix, but worth fixing. Documentation should match the repo exactly, especially for beginner-friendly hardware projects where people follow folder names step by step.
What I Learned
The main lesson was not that an ESP32 can serve a web page. I already knew that in theory.
The useful lesson was seeing how much can be built with almost no infrastructure.
One sensor. One board. One local server. One browser.
That is enough to turn a physical reading into a usable interface.
The second lesson is that simple projects still deserve engineering discipline. Keep secrets out of Git. Make the README match the code. Handle missing routes. Print useful serial logs. Choose display precision honestly. Document the assumptions.
None of that makes the project complex.
It makes it easier to trust.
Final Reflection
ESP32 Weather Report is not trying to be a complete weather station. It does not store trends, predict anything, sync to the cloud, or send alerts.
That is fine.
It is a focused project: read temperature and humidity, then serve the result through a clean local dashboard.
There is something satisfying about opening a browser and seeing a page that is not coming from a cloud server somewhere far away, but from a small board sitting on your desk with three wires connected to a sensor.
It is a reminder that the web does not always have to start in a data center.
Sometimes it starts on a breadboard.